 Many times you might have thought about redesigning your website to attract more visitors but you are afraid to do it because changing it can result to SEO disaster. Thanks to Richard Foulkes for sharing a sep by step guide on how to update your website to avoid SEO disaster. Read on. 🙂
The first thing any SEO thinks when a client says “I’m redesigning my website” is what impact will this have on all my work? In these events, often the client doesn’t even consider telling their online marketing agency about the redesign until two days before launch.
This resource will cover how to do SEO checks on your test site/development site to ensure the structure, URLs, Page Titles, Meta Descriptions and more all match up properly. It also serves as an SEO checklist touching on things that are often forgotten when a website goes through a complete overhaul.
Why consider SEO in a redesign?
Why is it important to consider your SEO during a website’s revamp? In short, you have a lot to lose.
Let’s say your site’s doing great. Rankings are strong, organic traffic is flowing and revenue is growing. Do you really want to undo all that hard work? I’m guessing not.
However, by thinking strategically, you can take the opportunity to improve a site’s performance after a redesign. That’s what this client did:

As you can see, a steady increase in traffic followed (from the red circle) even during the re-indexing phase. If you do a redesign right, you won’t lose any traffic or rankings; in fact, you’ll gain them.
Below I outline some steps that can help you understand the test site being built and your current site from an SEO viewpoint. This is vital when changing your website around, and I will cover how to make sure the web development agency keeps the important SEO work that’s gone into your website.
Step 1 – Consider the SEO
The first thing you must do is think about SEO. Too often clients don’t stop to consider the SEO impact of changing their website. They chuck away valuable content from historical pages or decide it would be a good idea to completely change every single URL without redirecting the old ones.
This only happens because they misunderstand how Google et al. read a website and how URLs hold credibility. It’s no fault of their own, but it happens.
Step 2 – Crawl the existing site
Why do I need to crawl my site?
If you don’t know what your site’s structure looks like now, you’ll set yourself up for a massive fall. Grabbing the structure, meta data and URLs is vital to identifying exactly what is changing and why.
How to do it
Your SEO crawl will give you a roadmap of how your entire site is currently set out. The best way to grab this data is to use a tool like Screaming Frog. Once you have the current site’s meta data and structure, you will know how to match the new site up.
Step 3 – Audit the old site
Next, you need to audit the site. Free tools like Woorank will do the job, but I strongly advise you to get your hands dirty and manually do the work yourself. There’s nothing like getting into the nitty gritty of your site to find any problem areas.
Why audit the site?
You need to know what search engines like and don’t like about your site. This can help you spot any problems areas, in addition to enabling you to see which areas must be retained.
What am I looking for?
Here are some of things we check at Liberty. Sometimes it’s worth checking more, but these are top-level checks:
Using your Screaming Frog data, I advise checking the following:
- Missing page titles
- Duplicate page titles
- Page titles over 512 pixels
- Page titles below 200 pixels
- Missing H1 tags
- Duplicate H1 tags
- Multiple H1 tags
- Missing meta descriptions
- Duplicate meta descriptions
- Meta descriptions over 923 pixels
- Canonical tags
- Canonicalisation
- Broken internal/external links
- Image alt text
You should also manually check for:
- XML sitemap
- Robots.txt
- Duplicate content (do exact match search “insert content” or use Copyscape)
- Pages indexed by Google (do a site: command in Google)
- Site speed and performance (here’s a tool to check)
- URL structure
- Pages indexed by Google using a site: command in Google
- Site speed and performance using Google’s PageSpeed Tools
This data gives you a good understanding of what the website’s doing well and areas for improvement.
Step 4 – Noindex your test site
Why do we need to noindex?
This stage is simple; yet it’s the point where many redesigns go awry.
If you’re working on your test site, the last thing you want is for Google et al. to index it. If you’ve added great new content, it will get indexed. Then when you launch the new site, the new content will have no value because it will be duplicate.
How to noindex your test site
A site can be noindexed in two ways by your developers.
1 – Tick the noindex box in your site’s CMS. If you have WordPress, for example, you simply check the box that reads: “Discourage search engines from indexing this site.”

This adds the following code in the <head> of every page:
![]()
2 – Your second option is to block the site in the Robots.txt file. This is a little trickier; hence, why most CMS have a box-ticking option.
If your CMS doesn’t allow for this, you can put the following in your Robots.txt file:
User-agent: *
Disallow: /
No CMS? You can manually insert the code if you have access to the header file by implementing the noindex, follow code as above.
Step 5 – Crawl the test site
Why should I crawl the test site?
You also need to understand how your test site is structured. Using a site crawler, crawl the test site again to see how it looks in comparison to your current site.
How to do it
- Open the first crawl of your current site and make a copy. Click “Save+As” and name the file “Current Site Crawl for Editing”. This is your editable copy.
- Crawl the test site. Export the test site crawl and save it as “Test Site Crawl”. Make a copy and name it “Test Site Crawl for Editing”—from now on we’re going to use this.
- Take the newly created old site crawl (Current Site Crawl for Editing from Step 1) and do a find and replace on all the URLs in Excel. Replace your domain name: “example.com” with your test server’s domain: “test.example.com”.
- Select all the URLs and copy them into a txt file (use something like notepad ++ or similar). Save this as the “Testing Crawl for Screaming Frog”. At this point, you should have the following documents:
- Current Site Crawl (xls)
- Current Site Crawl for Editing (xls)
- Test Site Crawl (xls)
- Test Site Crawl for Editing (xls)
- Testing Crawl for Screaming Frog (txt)
- In Screaming Frog, locate the Mode in the menu bar and select List. The system will change slightly, and you’ll be able to upload a .txt file to the crawler.
- Locate your txt file (Testing Crawl for Screaming Frog) of all the URLs you changed and pop that into Screaming Frog. Hit Start.
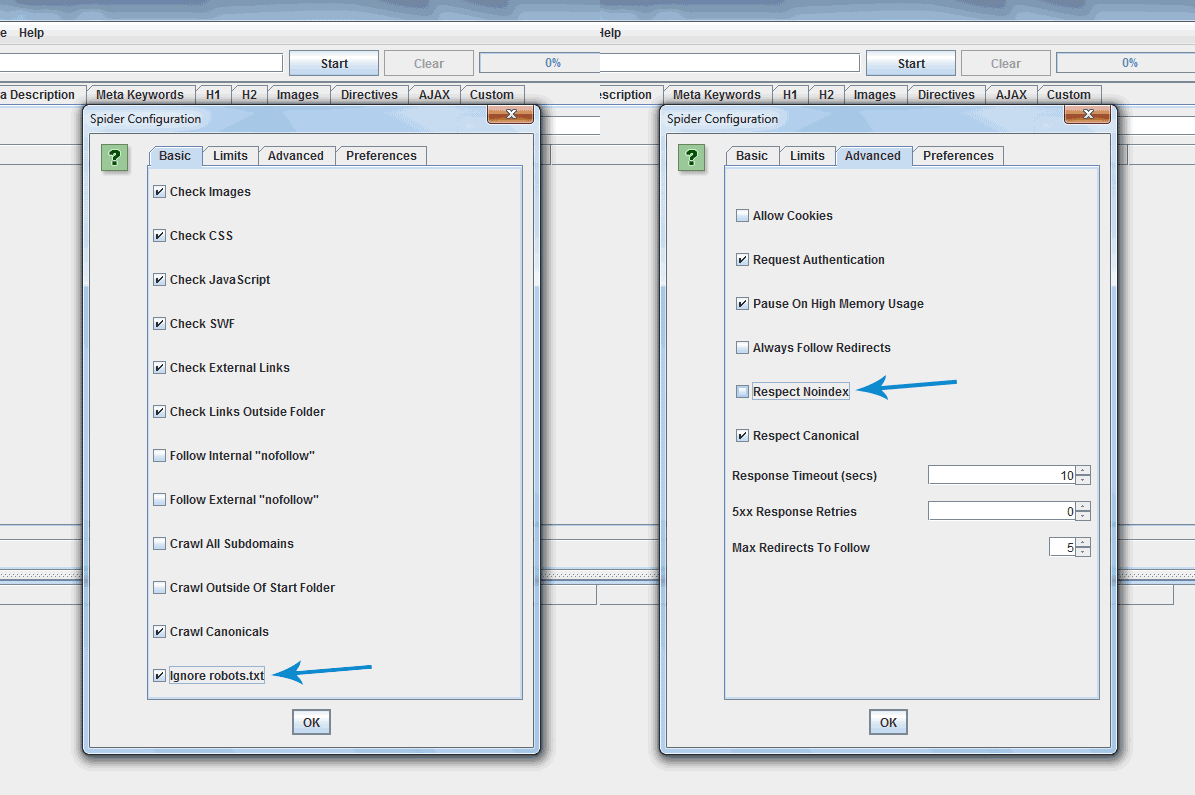
- If you followed this correctly, you’ll end up with all the URLs being crawled. If it didn’t, go back and make sure you didn’t miss anything. You’ll need to allow the crawler to crawl blocked/noindexed URLs. Simply click Configuration and Spider. Then you’ll find a tick box that says Ignore robots.txt. You may need to tick this. On the same part in the tab called Advanced, you’ll see Respect Noindex; you may need to un-tick this, too. It will look something like this:
Download all of the HTML and save it as an Excel file. Name it “Final Crawled Test Site”. This will be the test crawl you’ll check through later. Also, hold onto the very first crawl we did of the test site (Test Site Crawl).
At the end, you’ll have these docs:
- Current Site Crawl (xls)
- Current Site Crawl for Editing (xls)
- Test Site Crawl (xls)
- Test Site Crawl for Editing (xls)
- Testing Crawl for Screaming Frog (txt)
- Final Crawled Test Site (xls)
Okay, you made it. Now you have the data in Excel format, and you can see what works on the test site, and what doesn’t. This allows you to understand what’s missing from the test site that is on the current site.
Step 6 – Analyse Your Data
What we’re looking for
Now that we’ve done all the crawls, we need to open up the XLS spreadsheet called “Final Crawled Test Site” from Screaming Frog. You should see a lot of data.
First, delete the row across the top named “Internal HTML“. Then do the same for number “2,” if this is a blank row. You should have these headings:
- Address
- Content
- Status code
- Status
- Title 1
- Title 1 length
- Title 1 pixel width
- Meta description 1
- Meta description 1 length
- Meta description 1 pixel width
- Meta keyword 1
- Meta keywords 1 length
- H1-1
- H1-1 length
- H2-1
- H2-1 length
- Meta robots 1
- Meta refresh 1
- Canonical link element 1
- Size
- Word count
- Level
- Inlinks
- Outlinks
- External outlinks
- Hash
Some of these have the number “1” next to them, signifying that there is only one. If some of yours have number 2 next to them, then you have several of these. The elements you shouldn’t have a number “2” on are as follows:
- Title
- Meta description
- Meta keywords
- Canonical tag
- H1 (I’ll leave that open to debate)
With all this, we’ll begin identifying what changes need to be made.
Go to the Status Code header, click the filter icon and select 200 code. This shows all the URLs that are working. You might see “Connection Timed Out” on some of these. This could be because Screaming Frog timed out. Manually check these. If they work, just update the spreadsheet; if they don’t work, then you’ve identified a problem. Let the developer know these are timing out. They should be able to identify a fix.
How to match up the data
I’ve told you how to test the data, but not what to do with all those crawls. The purpose of crawling your current and test sites in this way is to identify meta data, structure and errors the test site currently has. First, apply a filter to the columns:
Locate the Level heading, right click and sort from smallest to largest. Now segment all the data. I start with Page Titles (Title 1). Take the first 7 columns on the spreadsheet and highlight them all. Copy and paste these onto another sheet within the same Excel spreadsheet called “Page Titles”. Do the same for “Meta Description”, but this time pick the first 4 columns, then 8-10. Repeat this for each section to end up with the different sheets as follows:
- Page Title Sheet
- Address
- Content
- Status code
- Status
- Title 1
- Title 1 length
- Title 1 pixel width
- Meta Description Sheet
- Address
- Content
- Status code
- Status
- Meta description 1
- Meta description 1 length
- Meta description 1 pixel width
- Meta Keywords Sheet
- Address
- Content
- Status code
- Status
- Meta keyword 1
- Meta keywords 1 length
- H1 Sheet
- Address
- Content
- Status code
- Status
- H1-1
- H1-1 length
- H2 Sheet
- Address
- Content
- Status code
- Status
- H2-1
- H2-1 length
- Canonicals, Word Count, Level, In-links and Out-links
- Address
- Content
- Status code
- Status
- Canonical link element 1
- Word count
- Level
- In-links
- Out-links
This number of sheets may look like overkill, but in my experience working with smaller amounts of data is much easier than trying to work on one large, data heavy spreadsheet.
Here’s the best bit
Remember all the crawls we did before? Well, we’ll need to go and open Current Site Crawl for Editing. Filter the Level first so it shows “smallest to largest“, then locate the following columns on this spreadsheet:
- Title 1
- Title 1 length
- Title 1 pixel width
Highlight all the data in these three columns and copy them into your test site spreadsheet onto the Page Titles Sheet in the empty columns. Place those three columns apart from Title 1 Pixel Width.
Now that you have the test site’s Page Titles next to the current site’s Page Titles, you can highlight the duplicates. Highlight both Title 1 columns and go to Conditional Formatting > Highlight Cell Rules > Duplicate Values. This will highlight everything that matches.
I have no shortcut for this. You’ll need to manually move things around and get them in the right place. I go about this by looking at the Page Title 1 closest to the left, (the one from the test site) then copy the text. Use the Find and Replace box (ctrl+F) to search the text. Hit “next” and go to the next match, where you’ll grab the three relevant columns and stick them next to the text you copied. Then repeat.
Sometimes nothing will match. When this happens, try doing this:
- Search a few words.
- Remove the brand at the end or beginning.
- Check if there is a | or - in place.
- Check for apostrophes.
- Check for misspellings.
These are a few things that may cause issues with matches, so be sure to check yours with vigilance.
Rinse and repeat
After you’ve done this process once, you’ll need to rinse and repeat for the other sheets to match up all your Meta Descriptions, Canonical Tags, Word Counts, etc. It’s important to remember that the point of checking these areas is to ensure that any changes are good changes.
Once you’ve nailed all 200 codes, you’ll want to look at the 404s.
Go to the Status Code header and select 404 on the filter icon again to find URLs that aren’t working. This is assuming you have 404s.
This will give you a list of all the URLs that didn’t work. In theory, it should give you everything else that needs to be checked. You should only have 200 status codes and 400 status codes, but sometimes you will have 500s or 300s that need further investigation.
404 time
If the URL is a 404, it means that the page doesn’t exist. So we’ll need to do one of two things:
- Create this URL on the test server.
- Redirect the old URL to the test server’s new URL.
Here’s an example of a 404:
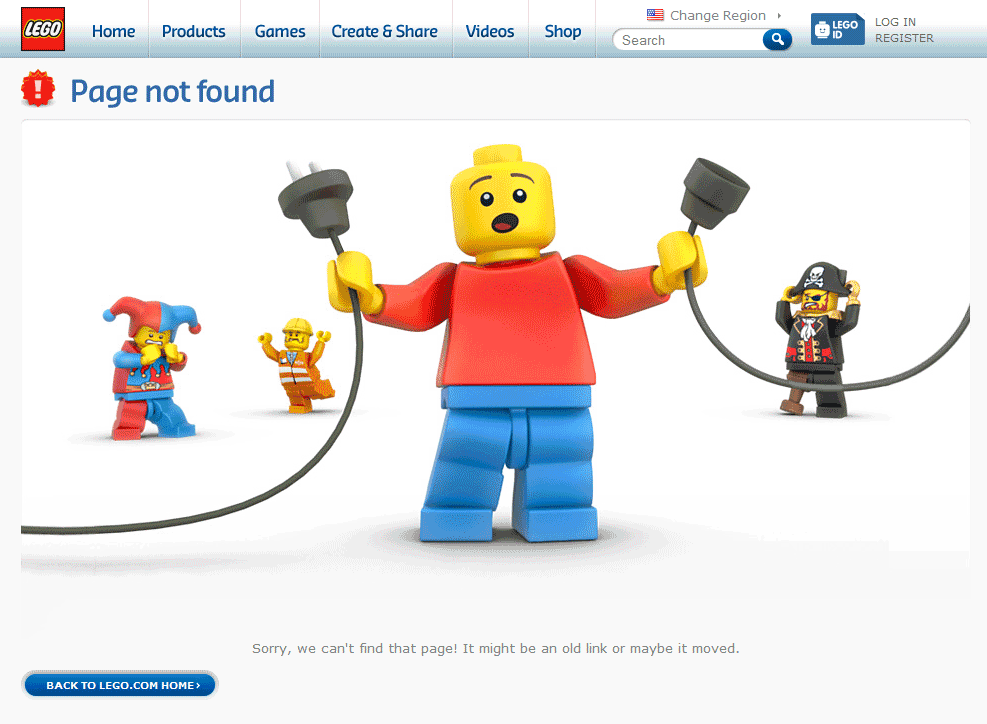
Look at the test server’s URL. If you think it needs to redirect, highlight it in red. If you have to create a new URL, fill its cell with the relevant meta data and highlight it green. Don’t forget what each colour means.
You’ll also need to highlight the corresponding URL that will redirect to the new version on the Current Site Crawl for Editing.
What do to with live URLs that aren’t on your current site?
These URLs are most likely new pages. Like with any page on your website, it has to be optimised correctly. There are tons of guides to help you here (this visual guide is my favourite).
Now what?
I’m glad you asked. Now you have a fully comprehensive spreadsheet of everything needed to minimise the damage of moving a site. You need to work closely with the developers to get the changes you’ve recommended implemented. With the spreadsheets laid out in this way, you can simplify the data and give the developers the bits they need, making their lives easier.
Don’t forget, when you redirect pages to a new site, you’ll lose around 10%-30% of your link equity. But you’re giving search engines the best opportunity to bring over your old site’s strong reputation.
From this point onwards, I’ll detail things that can go wrong, common problems, and important elements to check along the way to monitor the changes.
Now you’ve given the new URL structure and changes to your developers, you need to check they’ve got it right. You’ve been involved in several meetings discussing the strategy to proactively make sure you don’t upset the rhythm and have a positive impact on the changes. But, unfortunately, it doesn’t stop there.
You’ve more than likely been handing over changes periodically and testing as you go. Now, it’s a good opportunity to test everything again.
Crawl the test site again—being vigilant in cross-referencing all the relevant meta data and ensuring that the URLs match up. If they are even slightly off, then change them. One way you can check is to use “find and replace” in Excel. This time, swap the test.example.com with example.com, then crawl the URLs with Screaming Frog.
From now forward, make it a habit to check these additional elements.
Step 7 – All the additional checks
Rank check
Why do you need to rank check?
A rank check measures how the site performs for a host of keywords in search engines. You’ll use this data as a comparison for the newly launched site. If things change, you can react and identify the problems when you check the results.
What to look out for:
Big movements. If a keyword jumps from page 1 to page 20, you may have a problem. Look out for any big or unusual movements by checking these things:
- Did the URL change?
- Did you change the meta data?
- Has the page lost all its content?
- Is there a redirect in place?
- Does it have a noindex tag in place?
Content
Don’t delete anything you don’t have to delete. You might think your old blog posts aren’t needed, but they are all adding to the credibility of your site. Without these blogs, you’ll lose a chunk of value.
Similarly, now’s not the time to change your landing page content if you’re currently enjoying decent rankings.
Analytics code
This is pretty self-explanatory—make sure you place your analytics code back in the <head> section of the site. It is important to check the ecommerce tracking, goals and event tracking if you currently have those in place.
Unblock the site
It’s time to check the new site to see if it’s allowing search engines to index it. Simply follow the reverse instructions of blocking the site. Whichever method you used to block it, do the reverse to unblock. Failure to do this could create big problems when you launch the new site.
Summary checklist
Here’s the checklist I mentioned earlier. If you skipped to this, then use it as a guide to help you do a redesign with SEO in mind. With this in your arsenal, you never need to fear a website redesign again.
- Think about SEO from the start
- Crawl the current site
- Audit your existing site
- Stop the test site from being indexed
- Crawl the test site
- Find and replace URLs
- Crawl those swapped URLs
- Check test site meta data on live URLs
- Check 404s on test site
- Map out 301s
- Optimize all new pages
- Check implementation
- Do additional checks
- Launch!
Common problems to look out for
Each scenario will differ between websites. It’s important to understand how this foundation approach helps segment and break down important meta data so you don’t lose SEO value during a redesign.
As with any project, there are common problems SEOs, businesses and developers all come up against:
- Communication—This is the big one, which is why it’s first on the list. We all know how important communication is, and lack of communication is at the center of most problems associated with web redesigns. Right at the start, have your SEO in the initial strategy meeting with the web developers or anyone else who has an obvious connection with the website. From there, keep the lines of communication open.
- Missing meta data—Crawls can be fickle endeavors. You cannot afford to launch the new site with missing information. If you force search engines to guess what they should be putting there, the ensuing results will not be to your liking.
- Missing Content—All too often, content isn’t given the credit it deserves. Take the time to get the right content in the right places on the new site.
- Failure to implement redirects—This is a very important step. After you’ve laid out the redirects, it’s vital they’re put in place and work as planned.
Additional resources
Once you’ve checked these elements, you are in a strong position to launch. It’s still important to keep a close eye on the performance of the new site. Sometimes a single line of code can upset the rhythm.
Here are some additional resources to reinforce what we’ve covered here:
Search Engine Journal – Website Redesign Disaster
Search Engine Watch – Website Redesign: Re-launching Without Losing Sleep
Moz – Site Redesign - Checklist for Online Marketing
One last thing…
As with any changes to your website, it is important to monitor the situation. Use whatever tools you have available to keep a close eye on the following:
- Rankings
- Organic traffic
- Indexed pages
- Webmaster Tool errors
These things will help spot any problems. If you notice your rankings plummet, you can quickly investigate and make any needed changes.
If Webmaster Tools reports errors when Google tries to crawl the site, then you know to be proactive and explore the problem.
Once you are confident there are no issues, loosen up a bit. You don’t need to keep such a close eye on these things. You can work on promoting the site and carrying on with your growth and maintenance SEO work.
This article was originally
published by Richard Foulkes on
Moz.com
This content is syndicated news that can be used for your research, and we hope that it can help your productivity. This content is for educational purposes and is not made for any kind of commercial purposes of this blog.